Dr. Mario Viruses
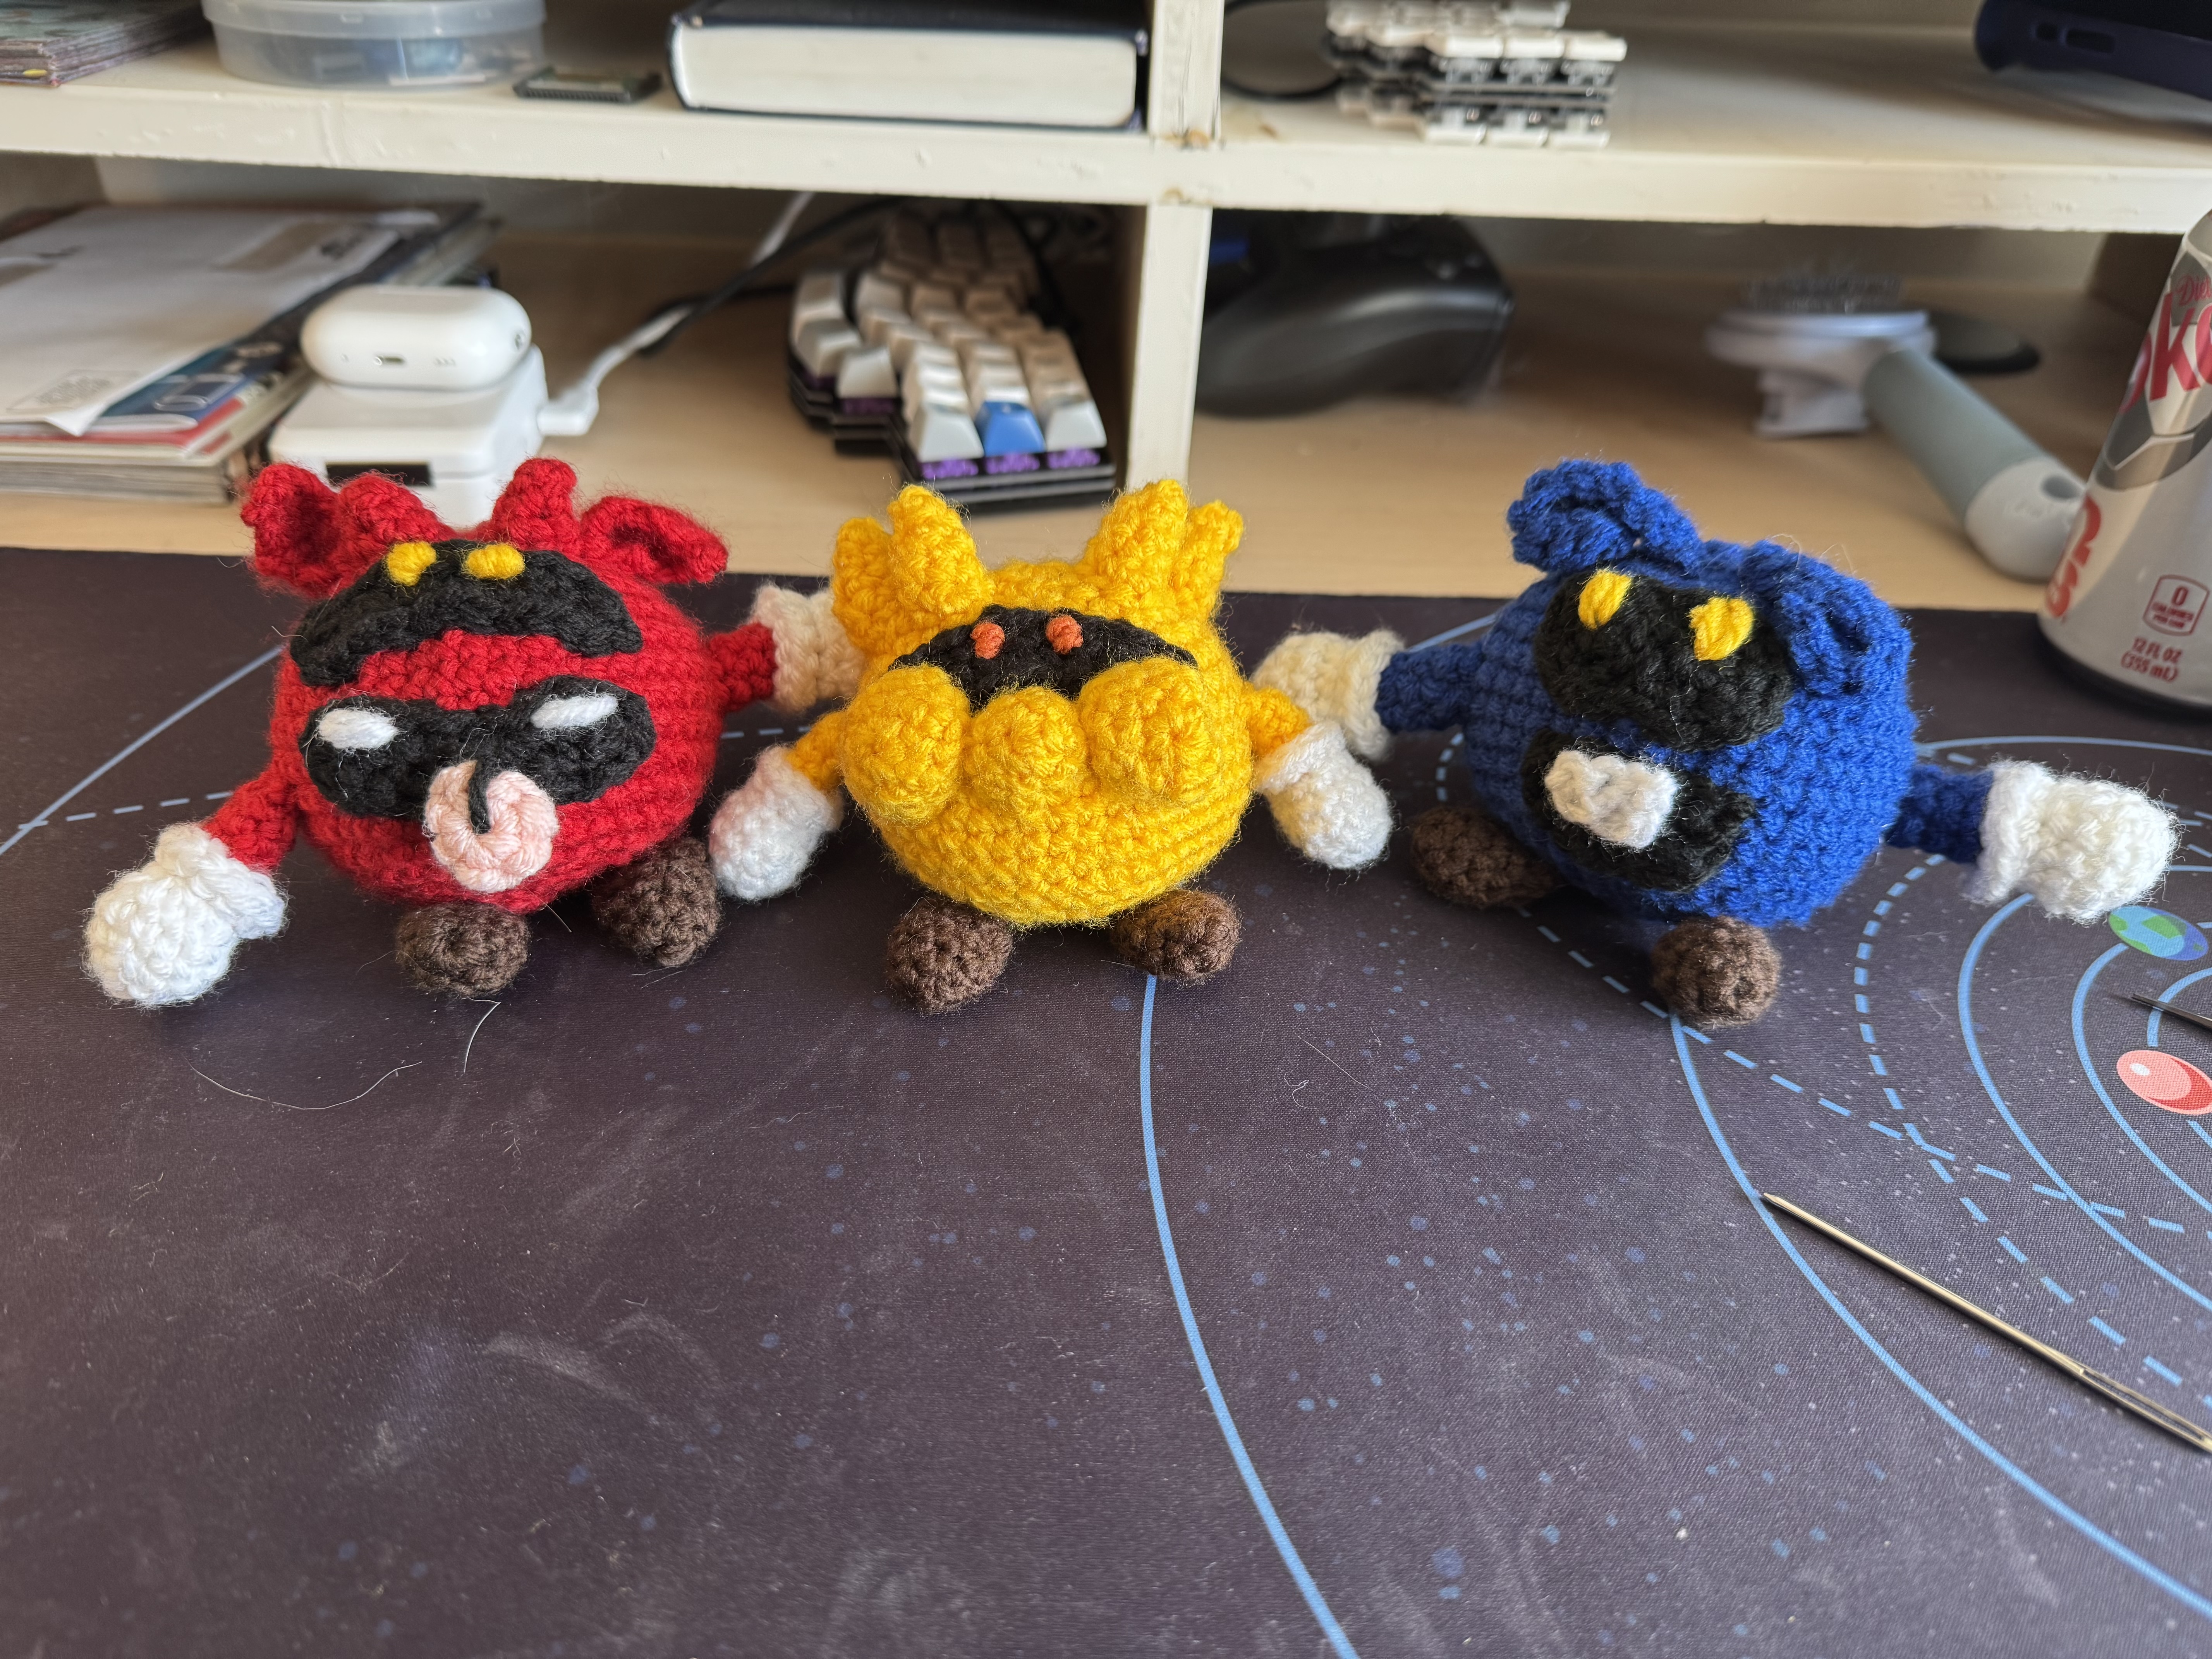
My mom's favorite video game of all time is Dr. Mario for the Nintendo 64. We've spent quite a few hours playing that game, even prompting my grandparents to buy a Nintendo Switch just to play this game. So, for mom's birthday this year, I crocheted the viruses from this "Dr. Mario and His Viruses" pattern, and made a couple changes.
Felt-less Guide
This is mostly just my bias, and because I don't really have felt at home, but I like avoiding felt in my projects. This is how I crocheted alternitives for the faces.
Blue Virus
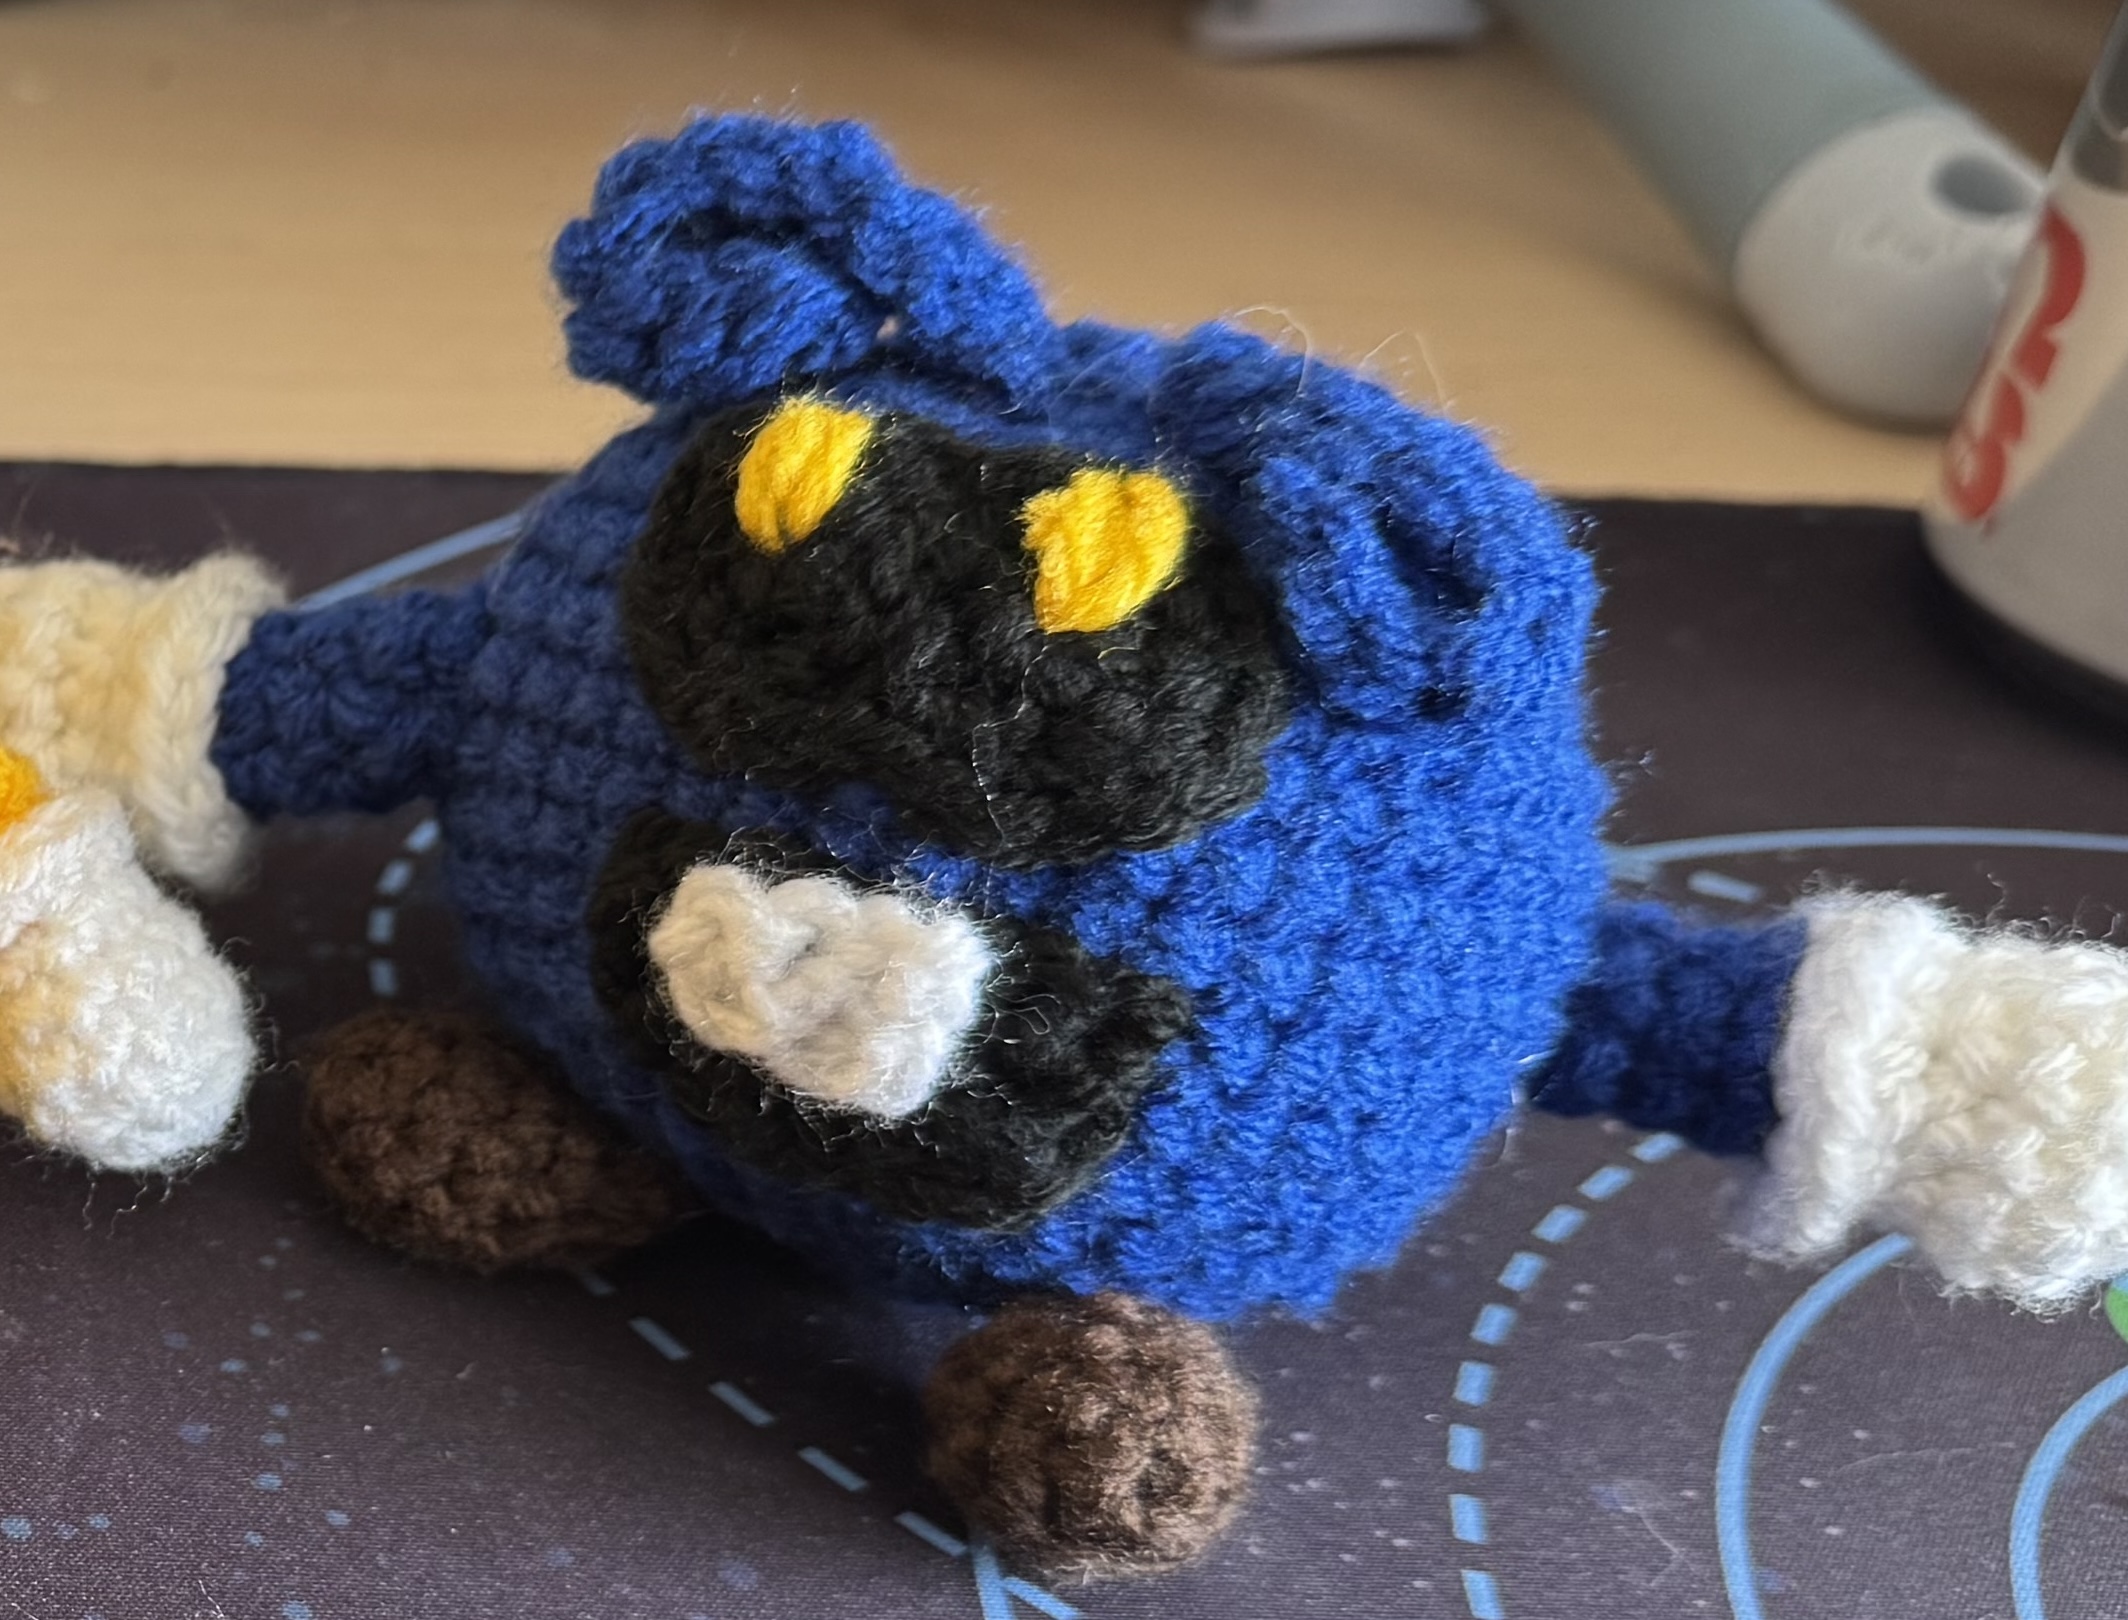
Eye Blacks (?)
Circles (Make 2)
- 6sc in magic circle
- Finish off (on second circle, do not finish off)
Now, join the two circles together into a 8-shape
- From the second magic circle,
scto connect to the next stitch on the first circle, then do4incaround the first circle scfrom the first circle back to the remainging stitch on the second circle, then4incagain- Finish off

Then, do the standard embroidery eyes for the pupils. I find this easier to do after sewing on the eye background.
Mouth
In black,
- 4ch, turn
- starting in second ch from hook, 3inc, ch and turn
- 3[sc, inc], chain and continue on the "edge"
- 7sc in the side posts, across the top of the mouth
Tooth
In white,
- 4ch, turn
- 3sc, finish off
Sew tooth onto the mouth before sewing the mouth onto the body
Red Virus
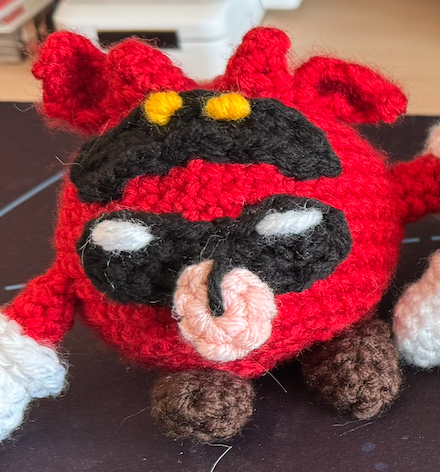
Eye Hole/Mouth
In black, make 2 (one will be the eyes, the other will be the mouth)
- ch 11 and turn
- In second ch from hook: 3sc, inc, sc, inc, 3sc, inc
- Rotate the chain 180°, and starting from the same chain the last inc of the last row went in: inc, 8sc, inc
Eyes
On one black bean-shape piece, in yellow do a pair of dot embroidery eyes for the pupils. Sew the eyes to the body
Mouth
In white, do the standard embroidery eyes horizontally for the teeth. Sew the mouth onto the body.
In pink, make a tongue by making a 6sc magic circle, and sewing the center onto the body in the appropriate spot.
In black, embroider a single black stitch for the tongue crease
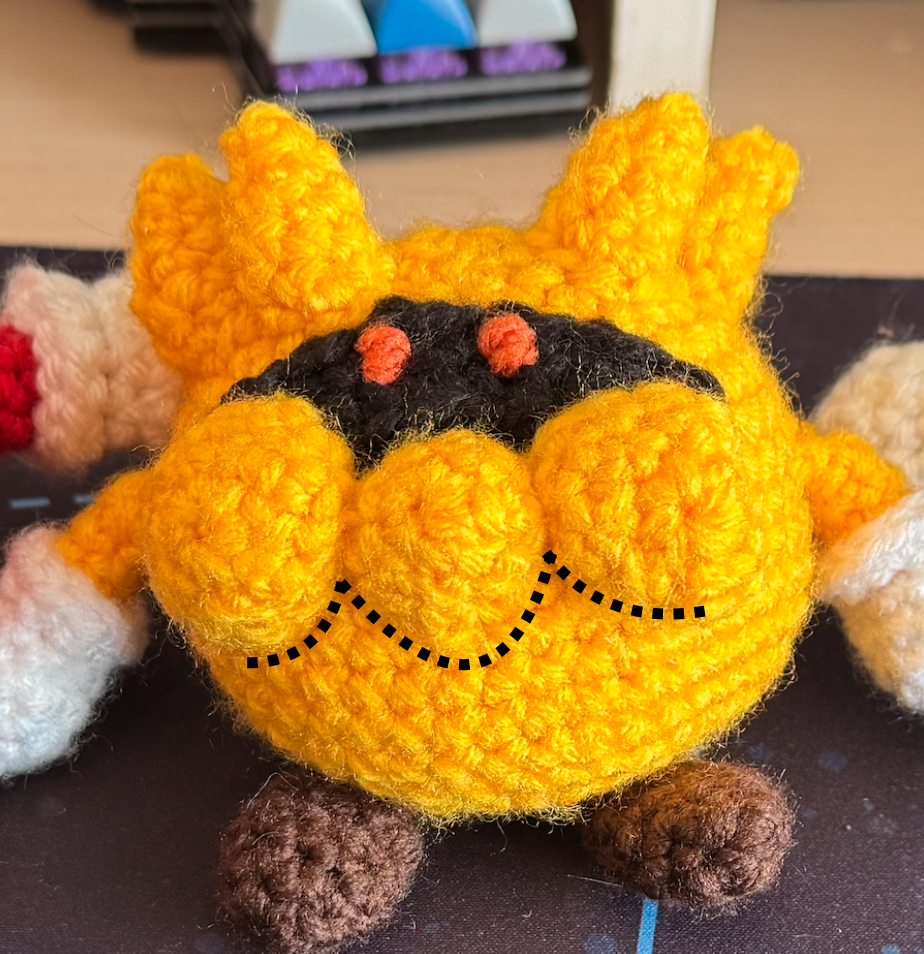
Yellow Virus
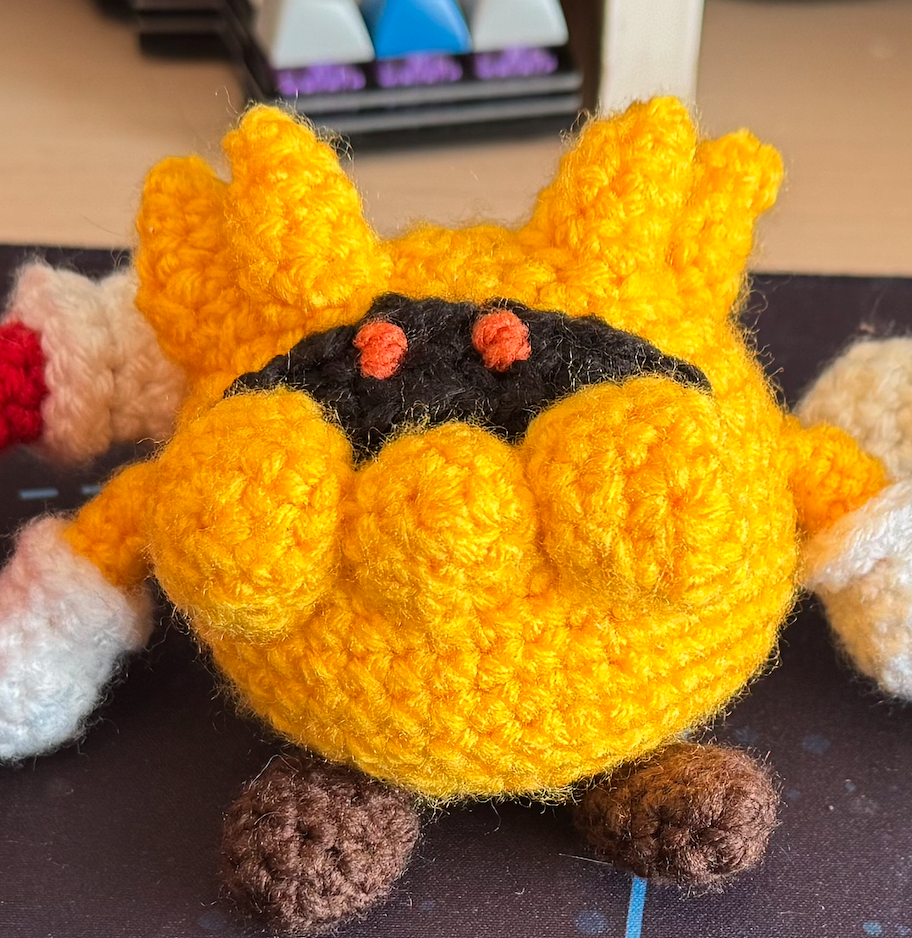
This is where I departed the most from the instructions. I couldn't figure out how to make an eye shape that matched the felt instructions and so instead I decided to incorporate the cheeks and nose from the original design of the virus
In black, make another eye-bean
- ch 11 and turn
- In second ch from hook: 3sc, inc, sc, inc, 3sc, inc
- Rotate the chain 180°, and starting from the same chain the last inc of the last row went in: inc, 8sc, inc
Sew the eyes onto the body.
In yellow, make 2 cheek pieces
- 6sc in a magic circle (6)
- 6inc (12)
- 12sc (12)
- 12sc (12)
In yellow, make 1 nose piece
- 6sc in a magic circle (6)
- 3[sc, inc] (9)
- 9sc (9)
Sew the nose and cheek pieces onto the face, overlapping the eye piece. I also used a couple stitches to sew the sides of the nose onto each adjacent cheek piece.
In orange, do a pair of dot embroidery eyes for the pupils.
[Optional] If you want, you could outline the mouth shape with a couple black embroidery stitches, but I didn't think it was necessary.
Other Changes
Body
- Like most of my projects, I like to alternate where I put my increases and decreases to avoid having these spheres have a hexagonal shape. This is inspired by the way Okla Novytska writes her patterns. A quick example is that for a row where the instruction is something like:
3[4sc, inc], I like to instead do3[2sc, inc, 2sc](which you could also write2sc, inc, 2[4sc, inc], 2sc). And I only do this on rows with instructions ofNsc, incwhere N is even. Rows where N is odd I leave alone.
I did this for each of the virus' bodies.
Hands
I found it hard to do the (FLO) (2sc, increase) around (12) step and then find the hidden back loops, so instead, I did this starting at step 4
- (2sc, decrease) around, switch to the matching body color (9)
- In the body color, using back loops only, do {BLO}(sc, decrease) around (6)
- sc for three rows (6)
- Finish off
- Afterwards, come back in white and in the exposed white front loops, do (2sc, inc) around (12)
- Do an invisible fasten off, linking back to the first white stitch in this row